Monday, May 14, 2012

First Fires and Baking

Wood-fired baking is an art and every oven firing brings its own challenges -- that's what I learned from Jeffrey Hamelman, who is a Master Bread Baker at King Arthur Flour.  I took his two-day course on Baking Bread in a Wood-Fired Oven a few weeks ago.  There's a lot to learn about life from baking bread and I left encouraged to keep working with my oven and learning life's lessons.  Thirteen people participated in the class and in baking our bread from the same recipes -- there were thirteen unique interpretations of each recipe.

Home again -- and I fired up the oven and when it was the hottest -- I cooked a couple of pizzas.  Jeffrey gave us a great pizza dough recipe and shared secrets on flipping the dough.  I can now say that I can twirl pizza dough in the air (and catch it). 


Firing up the oven
 
Coals spread - oven is ready to go


Great pizza!  A little carbon is good.


Inspired by the baking class, I prepared a loaf of country white for my first bake.  At the end of the bread class, Jeffrey gave each of us a starter from his 15 year old chef and I nurtured it to create enough for my bread.  Pizzas and bread have different temperature requirements -- pizza cooks when the oven is the hottest and bread cooks from retained heat at a cooler temperature.  On each firing, you have to heat the oven to the hottest to drive heat into the oven structure. You have to monitor the oven as it cools from 700-800 degrees to 500 or so degrees.  I ignored what I knew and put the loaf in when the oven was around 600-650 degrees -- resulting in a totally charred loaf.  Life's lesson -- be patient!

Yesterday was a beautiful day in Saratoga and I fired the oven for a pure bread bake.  I made 2 loaves each of country white and miche pointe a calliere (whole wheat).  I timed the firing process and my oven fired up to 800 degrees in 45 minutes -- with using the equivalent of 2 split pieces of wood and a generous amount of wood scraps.  The temperature dropped gradually and I loaded the oven with the 4 loaves of bread when it was around 575 degrees.  I steamed the oven before and after loading it which gave the finished loaves a nice crust.  My take on the final output is that the loaves burned slightly and I should have let the oven cool a little more before baking.  The white loaves were slightly undercooked (by about 5 minutes baking time) but they are still quite good!   


Loaves prior to baking
Miche pointe a calliere  loaves
Country white loaves

Sunday, May 6, 2012

Back on line with Wood-Fired Baking

After fumbling with my new wood-fired oven in 2011, I've set 2012 as the year to develop skills in cooking on it.  Last year I struggled with fires -- how high to fire the oven and how to cook more than pizzas!  So I decided to start with the fire and found a great book -- The Art of Wood Fired Cooking by Andrea Mognaini and John Thess.  Quickly I learned that I wasn't firing the oven correctly -- that it takes three stages of firing to get the heat driven into the oven -- and was only firing it in one stage.  It amazes me that I was able to cook anything in it last summer.  I've fired the oven several times already this spring and the new technique is working.


Friends and neighbors setting up the new bake oven - May 2011


Bake oven before first use


Bake oven ready to fire - 2011


Sunday, May 15, 2011

May Charcutepalooza - Sausage, Sausage, Sausage


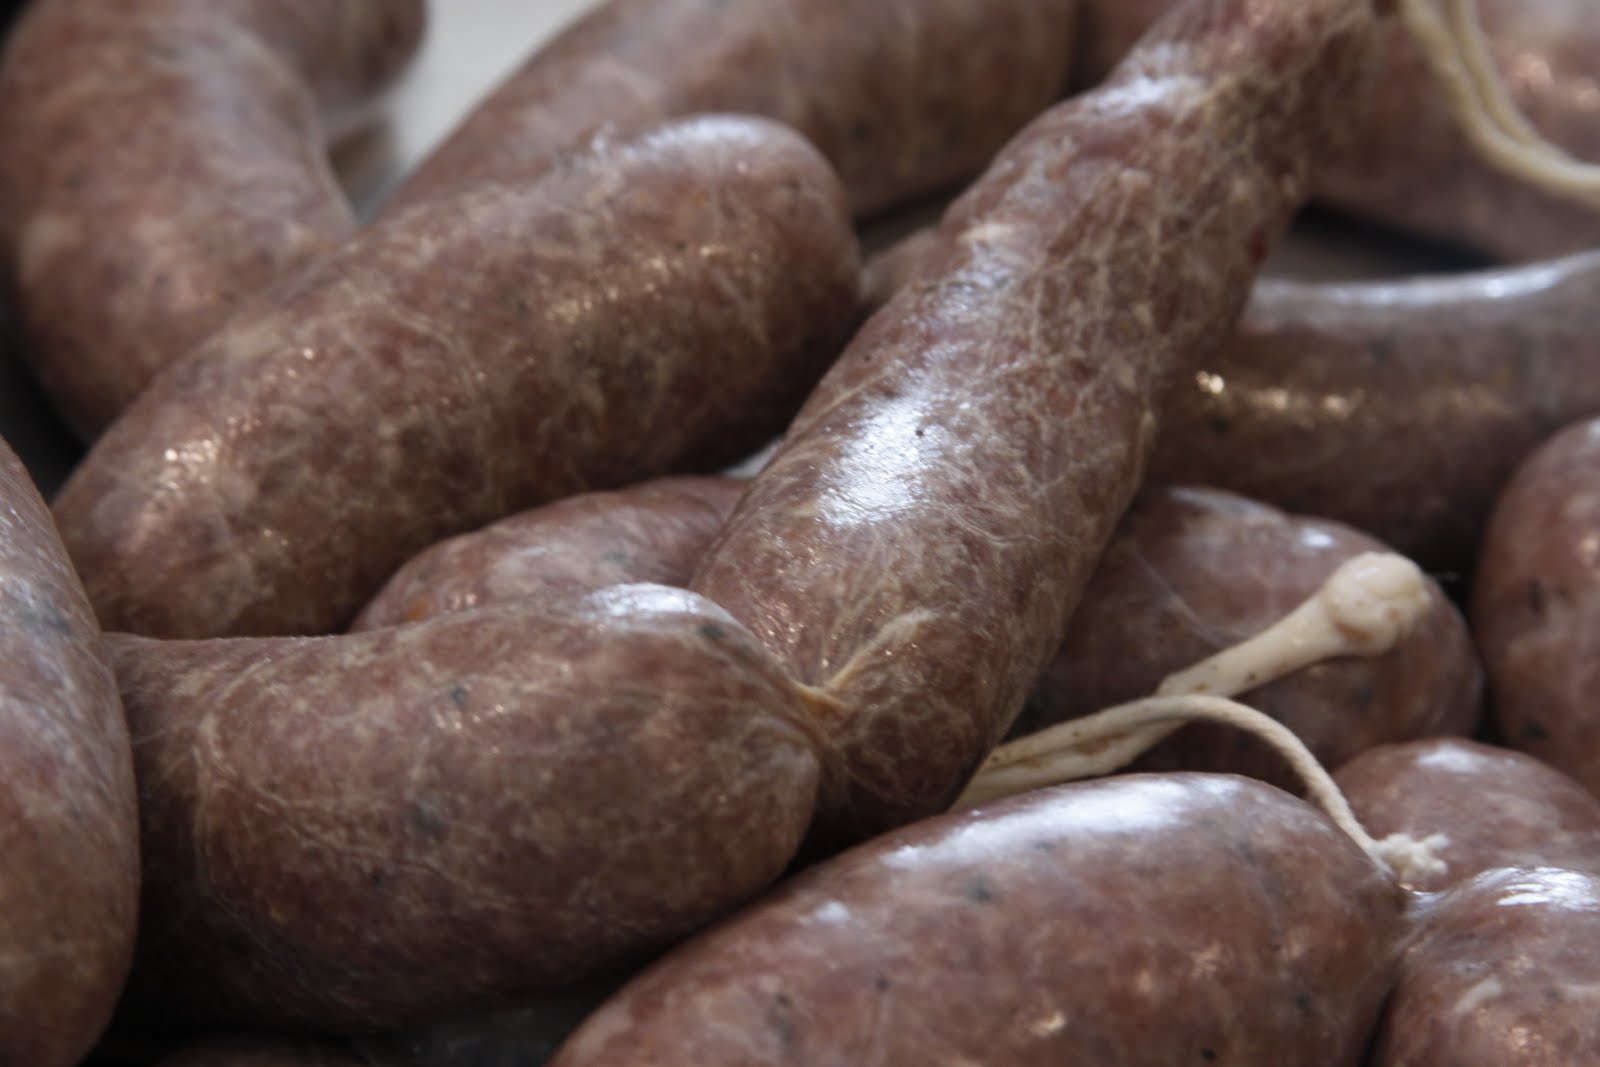
Finished Sausage!
The world of Charcutepalooza -- I'm trying things I never thought I could do and learning lots.  This month's challenge was to produce sausage -- several types of fresh sausage were on offer.  My choice was the pork garlic sausage with the addition of a few of my own spices.  I bought a grinder and sausage stuffing attachment for the reliable Kitchen Aid and secured some hog casings -- all from Amazon -- surprised by Amazon being a source for hog casings!!  My meat choice was the recommended boneless pork shoulder butt, garlic, salt and pepper and I added my own twist with toasted fennel and sage from my garden.  Initially, the garlic was the overwhelming flavor but as the mixture has settled, the toasted fennel is emerging as dominant.  No additional fat was added so the final product wasn't overly fatty (my complaint with a lot of sausage).
Seasoning ready to add to sausage
The process was chilling, cubing, chilling, chopping and combining, chilling, grinding (into chilled bowl), chilling, mixing, more chilling, stuffing, more chilling and eating/freezing.  Whew!  I did it solo and think it would be better as a two person operation -- one to push the meat and the other to guide the stuffing. 

I've served the sausage for two friend dinners.  One cooked on the stove top and the second on the grill with applewood smoke.  Both dinners were well received.

Tuesday, March 15, 2011

March Charcutepalooza

Seasoned, moist and tasty are a few of my adjectives for the March Charcutepalooza challenge – adventures in brining. Because I’m more of a baker, I’ve never experimented much with meat cookery. Charcutepalooza is changing that and I’m developing a lot more confidence in my skills. The March challenge included an apprentice challenge of brining a whole chicken or pork chops and a Charcuterie challenge of brining a piece of beef. My choices were a whole chicken and a beef brisket (in separate preps).

I followed the recipes in Charcuterie for both challenges. My biggest surprise was that I had to heat up the brining liquid to simmer to dissolve the salt and sugar and then cool it to refrigerator temperature before submerging the meat. I never did that in my previous experience brining a turkey for Thanksgiving – no wonder it never seemed to work! The chicken was tasty and had a great texture. I used a free-range chicken from the local farmer’s market. I was unable to buy a brisket from a local farmer, so I cheated and bought a beef brisket from my local BJ’s. Once the brisket was brined, I braised it for around 4 hours. The result was a nice piece of corned beef.

The corned beef was made into mini Reuben sandwiches for a party last Saturday. I give a shout out to Nancy, Holly, Jude, Claire and Marjorie, who mixed, formed, ate, sipped and gabbed on Saturday. I used Zoe Francois Artisan Bread in 5 Minutes and taught my friends the technique. They baked boules, baguettes, pain d’epi and pitas over several hours. The Reuben sandwiches were a hit – whenever I passed a plate, it came back empty. Comments included the best corned beef I ever tasted.

Brined and roasted chicken
Corned beef
Mini reuben
Multiple minis with my favoriate, sour cornichons
One of the boules from Saturday

Wednesday, February 16, 2011

February Charcutepalooza


Welcome to the world of Charcutepalooza – a year-long celebration of the craft of meat – salting, smoking and curing. Charcutepalooza is the creation of food bloggers Mrs. Wheelbarrow and The Yummy Mummy (http://theyummymummy.blogspot.com/). They lay down a monthly meat challenge for participants, taken from recipes and guidance in Charcuterie by Michael Ruhlman and Brian Polcyn. Information about the challenges, “ruhls” and bloggers are on Mrs. Wheelbarrow’s blog site (http://www.mrswheelbarrow.com/).

A couple of things attracted me to Charcutepalooza. The first is my nearly complete lack of knowledge of meat (only surpassed by my complete lack of knowledge of seafood). What a better way to learn? I participated in Tuesdays with Dorie to teach myself more about baking and pastry and this suits my style of learning by doing. Michael Ruhlman is one of my favorite non-fiction writers and food bloggers so using his book as the guide also was a draw. I love French charcuterie – smoked meats, cornichons and sour onions, Dijon mustard and a fresh baguette. This is my entre to making it rather than gathering it!

The February challenge was the Salt Cure and was broken into an Apprentice Challenge – making cured and roasted bacon – and a Charcuterie Challenge – making pancetta. Before I could begin the challenge, I needed to gather a few things. The first was the Ruhlman and Polcyn bible which came very quickly from my used bookseller. The salt cure itself had a few new ingredients—including cure salt and juniper berries. Living in the Capital District, I have access to some terrific food suppliers and was able to get both items locally from Adventures in Food Trading (http://www.adventureinfood.com/). We had a couple of days of blizzard conditions which slowed me in attacking the challenge. The last and most important item was the meat. One of the Charcutepalooza “ruhls” is to source meat as locally as possible from farms that humanely raise the animals. Again, this area is rich in farms and I am lucky to have Flying Pigs Farm in nearby Shushan, New York (http://flyingpigsfarm.com/). Flying Pigs raises heritage breeds and is a major vendor at New York’s Greenmarket – yes, they travel weekly from Shushan to New York City. When I picked up my pork bellies at the farm, the manager knew all about Charcutepalooza and had already filled several orders for pork bellies.

With all my ingredients, I mixed my basic salt cure (by weight, not volume). For the Apprentice Challenge I processed two pork bellies. To one, I added extra brown sugar and to the other, I added maple syrup, of course, local NYS syrup. At the same time, I mixed the savory salt cure for the pancetta. Being rubbed with their cures, they went into the refrigerator in individual plastic bags. Every few days, the bags were flipped until the bellies were firm. At that point, they were brought out of the refrigerator and the salt cure washed off. The bacon bellies were roasted in a very slow oven until their internal temperature reached 150 degrees F. The pancetta belly was wrapped in cheesecloth because it was too small to roll and it’s currently hanging in my cool and humid back room.

Bacon, bacon, bacon!
Cured & Roasted


Today I cooked and tasted my first slice of bacon (brown sugar cured) in an open-face BLT. The sandwich was served on homemade bread from Zoe Francois’ Artisan Bread cookbook. The tomato was one that I bought on the vine (and tasted pretty close to how a tomato tastes in the summer). I found it challenging to slice the bacon thinly, used a single slice of my homemade bacon on my BLT which was more like 2-3 slices of commercially bought bacon and found it very filling. It was delicious. I’m planning to use a few more slices in the next few days to make Amatriciana sauce (Divina Cucina’s recipe) and then slice and freeze the remainder. The pancetta has 5-6 days more to dry. When it’s done, I’ll make carbonara and write a post to the blog.

BLT with Salt Cure & Brown Sugar


Sunday, August 9, 2009

A Julia Child Feast

As a young twenty-something, watching Julia Child’s The French Chef on Sunday evening was my introduction to fine cooking. I bought her cookbooks and picked a few favorites that became part of my repertoire. When My Life in France came out, I bought a hard-cover copy and was delighted to learn about how she became Julia Child, my mentor. About the same time, I also was delighted to read Julie Powell’s sweet book. The opening of the movie that combines the two stories required a special celebration.

I invited my close friends to a Julie and Julia potluck dinner. Everyone was asked to channel their inner Julia Child and produce a dish from one of her cookbooks – but preferably from Mastering the Art of French Cooking (MAFC). We planned to go to the Julie and Julia movie following the dinner. So on a perfect Saturday evening in Saratoga Springs, we set out on our dining and viewing adventure.

Everyone arrived around 4:30 to allow us time to eat and make a 7:30 movie time. The meal began with an aperitif of sparkling wine with cold blueberry soup. The cold blueberry soup was not a Julia recipe but one I got from Kim SuneĂ©. I attended her cooking demo this summer at the Battenkill Kitchen. Everyone loved the combination and Kim’s recipe from her book, The Trail of Crumbs (kimsunee.com) is below:

Chilled Blueberry Soup

Add 1 or 2 teaspoons of this to a glass of champagne or prosecco for a sweet summer sparkler; use to top crepes, pancakes or ice cream; or serve for dessert in chilled espresso cups.

  • 6 cups fresh blueberries, divided, or 2 (12 ounce) bags frozen blueberries
  • 4 cloves
  • ½ cup liquid honey
  • 1 vanilla bean, scraped, or 1 cinnamon stick
  • 1 Tb fresh lemon juice
  • 3 Tb crème de cassis
  • 1 Tb balsamic vinegar
  • Garnish: lemon or orange zest, crème fraiche

Rinse blueberries and place all but 1 cup in a large pot. Add cloves and stir in honey. Split vanilla bean lengthwise, scrape seeds into pot using tip of knife, and add scraped bean halves (or scrape cinnamon into pot and add stick). Add 1 cup water and stir.

Bring to a boil, reduce heat and let simmer about 10 minutes. Strain, using back of spoon to crush berries, through a fine sieve into a bowl. Discard solids. Let soup cool. Stir in lemon juice, crème de cassis, and vinegar. Add more honey, as needed. Chill in refrigerator 4 hours and up to 2 days. Serve in chilled bowls with reserved 1 cup fresh blueberries. Garnish if desired. Makes 3 cups.

To accompany the aperitif, I made Julia’s Galettes au Fromage (p. 197 MAFC). Julia’s instructions wer2009 08 09_1911e to test bake one because the amount of flour to use depended on the cheese used. Was she right! I used a softer cheese than the recipe and my first test just flattened out on the sheet. I added more flour and the second test was successful.

Marjorie Martin made our first course of Vichyssoise (p. 39, MAFC). She bought new bowls for the party (she said it was one of the wonders of the 2009 08 09_1917Dollar Store) and she garnished the soup beautifully with minced chives. Marjorie rated it a very easy recipe. We paired this part of the meal with Pouilly-Fuse. Throughout the meal Kay Olan provided a constant supply of beautiful baguettes from Mrs. London’s (she is not a cook and not apologetic about it)!

After the soup, we went to the main course. This was nearly overwhelming! We had a Salade Niçoise, Roast Chicken, Tomates a La Provençale and Timbale of Fresh Corn. We opened a bottle of Cotes du Rhone Rose to accompany.

2009 08 09_1928 Jude Nordhoff made the Salade Niçoise ( p. 542, Mastering the Art of French Cooking). She was a little flustered by the recipe, said it took her much longer to make than anticipated and had to improvise the dressing because the cookbook referred her to a page she didn’t copy. What the matter, the results were spectacular.
2009 08 09_1930

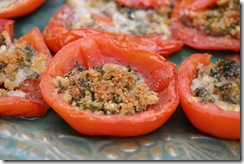
Nancy Luther made the Tomates a La Provencale (p. 507 MAFC). She minced the ingredients by hand (a la Julia) and said it took a lot more effort than she anticipated. Julia recommended that the tomatoes not be crowded in the dish and Nancy discovered that if they had been crowded they would have been difficult to serve. Gratefully, Nancy left me some tomatoes ready for heating today.

H2009 08 09_1925olly Lawton came with the Timbale of Fresh Corn (p. 127, Julia Child & Company). It was delicious. I’m including the recipe because not many of my friends have the cookbook and Holly said she would make it again and again and again.

Timbale of Fresh Corn

For an 8-cup baking dish, serving 8 people

  • 12 or more ears fresh corn (to make about 3 cups grated corn)
  • 6 eggs
  • 2-3 Tb grated onion
  • 1 tsp salt
  • 4-5 Tb minced parsley
  • 2/3 cup lightly pressed down crumbs, from crustless nonsweet white bread
  • 2/3 cup lightly pressed down grated cheese (such as a mixture of Swiss and/or Cheddar or mozzarella)
  • 2/3 cup heavy cream
  • 1/8 tsp Cayenne pepper
  • 8-10 grinds fresh pepper

Scrape or grate the corn and turn into a measure to be sure you have about 3 cups. Beat the eggs in a mixing bowl to blend; then add all the rest of the ingredients listed, including the corn.

Recipe may be completed even a day in advance to this point; covered and refrigerated.

Preheat oven to 350 degrees. About 2 hours before serving, butter the baking dish and line bottom with a round of buttered wax paper. Stir up the corn mixture to blend thoroughly and pour into the dish. Set corn dish in a bain-marie. Bake in lower-middle level of oven for half an hour, then turn the temperature down to 325 degrees. Baking time is around 1 ¼ to 1 ½ hours, and water surrounding the timbale should almost but never quite bubble; too high heat can make a custard grainy. Timbale is done when it has risen almost to fill the mold, the top has cracked open, and a skewer plunged down through the center comes out clean. Let rest 10 minutes or more in turned-off oven, door ajar, before unmolding.

May be baked an hour or so before serving; the timbale will sink down as it cools.

2009 08 09_1927 My contribution was Roast Chicken (p. 240, MAFC) which was supposed to be a “perfect” roast chicken. It wasn’t perfect, but pretty good. A couple of problems with trussing (no trussing needle made inserting the string a little difficult) made it difficult to roast the chicken on its side. My solution was to roast it upside down. Also, I was less than diligent about basting, but did get in a several bastings. I reduced to pan juices to a sauce (burned my finger by grabbing the hot handle of the roasting pan on the stove) and poured it over the finished bird (which I cut up into serving pieces before it went to the table).

By this time we were all really stuffed so we took a little pause before the cheese course. We soon started on the cheeses which included gorgonzola, Wensleydale with apricots and a creamy camembert.2009 08 09_1935

Beverly Reedy brought dessert – Tarte au Citron et Aux Amandes (p. 646, MAFC). Let me tell you a little about Bev. She is a local chef – founded Beverly’s on Phila Street in Saratoga, currently owned by her son Michael Bowman, and author of the cookbook Beverly’s Best (http://beverlysbest.net). She also has a line of barbecue sauce, sweet relish and apple butter that is carried at the restaurant and other locations2009 08 09_1913 in the Northeast. Beverly bakes! She followed MAFC but said with her own recipes she could turn out the tart in about an hour. She had issues with Julia’s technique for candying the lemon rind and thought her own method is a lot better. The tart was fabulous and she served it with a berry puree sauce (blueberries, blackberries and raspberries). We also had some crème FraĂ®che to accompany the tart.

Okay, we missed the Julie and Julia movie because the dinner lasted four hours. No one felt stuffed by the end because we paced out the meal and did not rush. Guess the French have it right. It was a lovely meal with great friends. We’ll be getting together next week for the movie.

2009 08 09_1921

Kay & Jude

2009 08 09_1922

Holly & Marjorie

2009 08 09_1923

Marjorie & Kay

2009 08 09_1924

Beverly & Nancy

Saturday, June 27, 2009

It's Only a Bakewell Tart!


The June Daring Bakers' challenge was hosted by Jasmine of Confessions of a Cardamom Addict and Annemarie of Ambrosia and Nectar. They chose a Traditional (UK) Bakewell Tart... er... pudding that was inspired by a rich baking history dating back to the 1800's in England. I've actually stayed in Bakewell and tasted a Bakewell tart. I don't remember it being as good as this recipe.

When I told an English acquitance that I was making strawberry jam for a Bakewell tart, he wondered why because it's only a Bakewell tart! Well I did make strawberry jam, not specifically for the tart but it got used in it anyway. My jam center was half and half strawberry and rhubarb-ginger jam (also homemade). Also, I substituted lemon extract for almond extract.

In the past few years, I've switched to uncooked jams -- they go in the freezer and I find the fruit flavor much fresher than the cooked jams. My freezer has raspberry jam from last year and two new batches of strawberry jam. They make great toppings for ice cream as well as peanut butter and toast.

Bakewell Tart…er…pudding

Makes one 9” tart
Prep time: less than 10 minutes (plus time for the individual elements)
Resting time: 15 minutes
Baking time: 30 minutes
Equipment needed: 9” tart pan or pie tin (preferably with ridged edges), rolling pin

One quantity sweet shortcrust pastry (recipe follows)
Bench flour
1 cup jam or curd, warmed for spreadability
One quantity frangipane (recipe follows)
One handful blanched, flaked almonds

Assembling the tart
Place the chilled dough disc on a lightly floured surface. If it's overly cold, you will need to let it become acclimatised for about 15 minutes before you roll it out. Flour the rolling pin and roll the pastry to 1/4” thickness, by rolling in one direction only (start from the centre and roll away from you), and turning the disc a quarter turn after each roll. When the pastry is to the desired size and thickness, transfer it to the tart pan, press in and trim the excess dough. Patch any holes, fissures or tears with trimmed bits. Chill in the freezer for 15 minutes.

Preheat oven to 400F.
Remove shell from freezer, spread as even a layer as you can of jam onto the pastry base. Top with frangipane, spreading to cover the entire surface of the tart. Smooth the top and pop into the oven for 30 minutes. Five minutes before the tart is done, the top will be poofy and brownish. Remove from oven and strew flaked almonds on top and return to the heat for the last five minutes of baking.

The finished tart will have a golden crust and the frangipane will be tanned, poofy and a bit spongy-looking. Remove from the oven and cool on the counter. Serve warm, with crème fraîche, whipped cream or custard sauce if you wish.

When you slice into the tart, the almond paste will be firm, but slightly squidgy and the crust should be crisp but not tough.

Sweet shortcrust pastry
Prep time: 15-20 minutes
Resting time: 30 minutes (minimum)
Equipment needed: bowls, box grater, cling film

8oz all purpose flour
1 oz sugar
½ tsp salt
4oz unsalted butter, cold (frozen is better)
2 egg yolks
½ tsp lemon extract
1-2 Tbsp cold water

Sift together flour, sugar and salt. Grate butter into the flour mixture, using the large hole-side of a box grater. Using your finger tips only, and working very quickly, rub the fat into the flour until the mixture resembles bread crumbs. Set aside.

Lightly beat the egg yolks with the almond extract (if using) and quickly mix into the flour mixture. Keep mixing while dribbling in the water, only adding enough to form a cohesive and slightly sticky dough.

Form the dough into a disc, wrap in cling and refrigerate for at least 30 minutes.

Frangipane
Prep time: 10-15 minutes
Equipment needed: bowls, hand mixer, rubber spatula

4.5 oz unsalted butter, softened
4.5 oz confectioner's sugar
3 eggs
½ tsp lemon extract
4.5 oz ground almonds/almond flour
1oz all purpose flour

Cream butter and sugar together for about a minute or until the mixture is primrose in colour and very fluffy. Scrape down the side of the bowl and add the eggs, one at a time, beating well after each addition. The batter may appear to curdle. In the words of Douglas Adams: Don’t panic. Really. It’ll be fine. After all three are in, pour in the almond extract and mix for about another 30 seconds and scrape down the sides again. With the beaters on, spoon in the ground nuts and the flour. Mix well. The mixture will be soft, keep its slightly curdled look (mostly from the almonds) and retain its pallid yellow color.


Tuesday, June 9, 2009

Saratoga (Parisian) Apple Tart and Peonies


This week's TWD Parisian Apple Tart is a keeper and will be a regular dessert feature for future dinner parties. The recipe was selected by Jessica of My Baking Heart and the recipe is available on her blog. Because of this week's TWD, I now have puff pastry sheets to last a long time. To try to get a better quality puff pastry dough, I visited Adventure in Food, a specialty food wholesaler in Albany, NY, where I purchased a "small" box of frozen puff pastry -- made by Pennant from France. The small box isn't really that small and as a result I now have 20 (- 1/2 sheet) 12 oz pastry sheets resting in my freezer. I like them already because they're packaged flat rather than folded like the Pepperidge Farm puff pastry. I always hated rolling across the fold. Anyway, I'm seeing a summer of beautiful tomato tarts with the beautiful San Marzano tomatos that I anticipate harvesting from my garden.

Speaking of gardens -- my first peony is now blooming. The flowers are easily 6 inches across and they smell delightful. I took some pictures to share as well as my newly remodelled veggie garden.


Tuesday, June 2, 2009

Cinnamon Squares??? - Chocolate Heaven


When I first saw the listing for this week's TWD selection, I wasn't impressed and didn't think I would participate. Over the weekend I looked at the recipe and thought it looked interesting and really easy to make. I've been spending a lot of my time in the garden so I'm looking for easy right now. It was easy, but I think the name is wrong. It should be a name that includes the abundant chocolate in the recipe -- maybe Dark Chocolate Squares or maybe Chocolate Heaven. Any suggestions? The recipe is available at http://traceysculinaryadventures.blogspot.com. In my recipe, I substituted buttermilk for whole milk.

The veggie garden is planted but still kind of young to photograph. I've added some features to make it fit better with my old 1840s house. Pictures will come soon. The perennial flowers are starting their display. The clematis and columbine are blooming and the gorgeous peony is about ready to pop. The macro lens makes everything look incredible.


Sunday, May 17, 2009

Springtime - Ricotta Gnocchi and Asparagus


This is the opening challenge for Daring Cooks and as promised -- it looked simple but proved a little more difficult to form the gnocchi. The master gnocchi recipe was taken from the cookbook by Judy Rodgers, named after her restaurant, The Zuni Café Cookbook. I made the gnocchi for the 14th but only finished the recipe today. I took my inspiration for my final recipe from a Babbo recipe for asparagus and ricotta ravioli. I blanched and chilled the asparagus and added it to the pan with melted butter. When the gnocchi cooked, I added it to the sauce along with some pasta water. I garnished it with shaved reggiano parmesan. It was delicious!

Tuesday, May 12, 2009

TWD - Tartest Lemon Tart


Okay, I love this recipe but couldn't really believe that it called for whole lemons! I wonder how common this is? Yesterday David Lebovitz posted a lemon tart recipe in which he used only lemon zest and lemon juice -- http://www.davidlebovitz.com/archives/2009/05/tart_au_citron_french_lemon_tart.html. His recipe made a point of using unsprayed lemons. I can hardly believe that any fruit is brought to market without being sprayed with all the creepy crawlers and insects in the warm climates where they grow. I used my supermarket lemons and scrubbed them with warm soapy water and a good brush -- making sure to remove the green Sunkist ink!

This was the last recipe I made during my marathon baking day for my friend's wake last week -- Tiramisu cake, peanut butter cookies and then this tart. The fact that tart crust was pressed in rather than rolled out, saved a ton of time and anguish. I finished off the tart with powdered sugar rather than creme fraiche. The recipe can be found at http://www.ayearfromoakcottage.com/.

Tuesday, May 5, 2009

RIP - Dear Friend, Kate

Today was the funeral for my friend Kate O'Connell, who passed last week. She was a poet, photographer, philospher and wonderful friend. Over the past few summers we had memorable jaunts to Tanglewood and the Glimmerglass Opera in Cooperstown. I will miss her.

Following her funeral, there was a reception for friends and family. This week's TWD Tiramisu cake (and next week's Lemon Tart) were part of my contribution. The recipe for the Tiramisu cake can be found on Megan's blog My Baking Adventures.

Tuesday, April 28, 2009

Plain Jane Cheesecake – April Daring Bakers


The April 2009 challenge is hosted by Jenny from Jenny Bakes. She has chosen Abbey's Infamous Cheesecake as the challenge.

This month of April, my thoughts are not so much on the kitchen as they are on my garden. For this Daring Baker challenge I went with a plain Jane cheesecake. No extra embellishments – just the cheesecake with flavoring courtesy of M. Cointreau. This was a wise decision because the plain cheesecake was fantastic -- it had a simple and clear flavor. The texture was the star -- smooth and creamy, almost melting in your mouth. The recipe is a winner -- the baking instructions produced a cheesecake with no cracks or sinkholes. Thanks for the recipe Jenny.


The weather in Saratoga Springs has been amazing for the past few weeks and I've been photographing some of the emerging plants and flowers on my daily walks.


Monday, March 30, 2009

Molto Bene! Lasagne of Emilia-Romagna

The Daring Bakers challenge has taken baking to a new a welcome change -- we're making pasta rather than sweets. The March 2009 challenge is hosted by Mary of Beans and Caviar, Melinda of Melbourne Larder and Enza of Io Da Grande. They have chosen Lasagne of Emilia-Romagna from The Splendid Table by Lynne Rossetto Kasper as the challenge. The challenge recipe can be found on their blogs.


The central part of the challenge was to produce hand-made pasta. In this recipe, Kasper uses spinach pasta. She gives directions for both hand-rolling and using a hand-cranked machine to produce the dough. I've owned a hand-cranked machine for ions so I pulled it out for this recipe. The other requirement was to use a white (bechamel) sauce. The choice of ragu recipe was open and I chose to use a recipe for ragu alla Bolognese from chef Fabrizio Bazzani of Chianti il Ristorante in Saratoga Springs.

Bazzani offers cooking demonstration dinners at his restaurant and I attended one focusing on Emilia-Romanga earlier this month. For Bazzani, ragu alla Bolognese is about the meat. Here's how he makes it:


9.5 oz ground pork
9.5 oz ground beef
3 oz pancetta, chopped
3 oz prosciutto, chopped
6 oz sausage
1 onion, finely chopped
1 carrot, finely chopped
1 rib of celery, finely chopped
1 full glass (or more) of red wine
9.5 oz ground peeled tomatos
Broth
Milk
Slat and Pepper
2 oz butter
2 oz extra virgin olive oil


Saute the pancetta, celery, carrot and onion with the butter and oil, season lightly with salt only. Add the ground meats, let it gain some color and pour in the wine. Let the wine evaporate then add the tomatos and a little broth (4 oz).


Lower the fire to a simmer and let it cook for three hours, adding broth if necessary. Toward the end, add the milk and let it finish cooking until it's been three hours. Season with salt and pepper at the end of the cooking time.


A word of caution -- the cooking ragu will smell wonderful -- given the aromatic vegetables, pancetta and proscuitto.

Tuesday, March 24, 2009

Bumble my Blueberries – Making Substitutions


Last week I glanced at the recipe for this cake and thought how simple it looked and didn’t include any unfamiliar techniques. I made the classic cooking mistake and didn’t read through ingredient list carefully. Yesterday I started making the cake. As I worked along, I came to the final steps that included combining the dry ingredients with buttermilk. No buttermilk in the pantry! Two choices – make a quick trip to the market or look for a substitution. Dorie’s Baking has a whole list of substitutions in the back of the book. I used her recommendation for buttermilk substitute by combining 2/3 cup of plain yogurt and 1/3 cup milk. It worked fine.

The recipe for Blueberry Crumb Cake is available at http://fundamentally-flawed.blogspot.com/. Thanks to Sihan for selecting the recipe.


Blueberry Crumb Cake in the late afternoon sun.